The Unbreakable Bond
There’s a reason your grandmother’s cast iron skillet is still sitting in the back of your cupboard—they are built to outlive civilizations. But that dark, shimmering, non-stick surface isn’t magic; it’s geometry. It’s a layer of polymerized fat—oil that has been baked onto the metal to form a plastic-like shield. If you want that legendary, stick-free performance, you have to follow a simple ritual. Forget the myths you’ve heard; caring for your iron is just basic chemistry. Here is the straightforward, no-nonsense guide to cleaning and prepping your cast iron, ensuring it remains the hero of your kitchen for generations.
(Links will take you to the Amazon product page where I may make a commision)
Step 1: The Cleaning Phase (Dispelling the Soap Myth)
The biggest myth about cast iron is that you must never, ever let soap touch it. The idea is that soap will strip the “seasoning,” your hard-earned non-stick coating. This isn’t entirely true anymore. Old-school soaps contained lye, which would dissolve the polymerized oil. Modern dish soap, however, is much milder and works by breaking down surface fats, not the cross-linked bonds of your seasoning. While you don’t need soap every time, you absolutely can use a drop to break up a messy situation.
- For light messes: Use hot water and a stiff nylon brush.
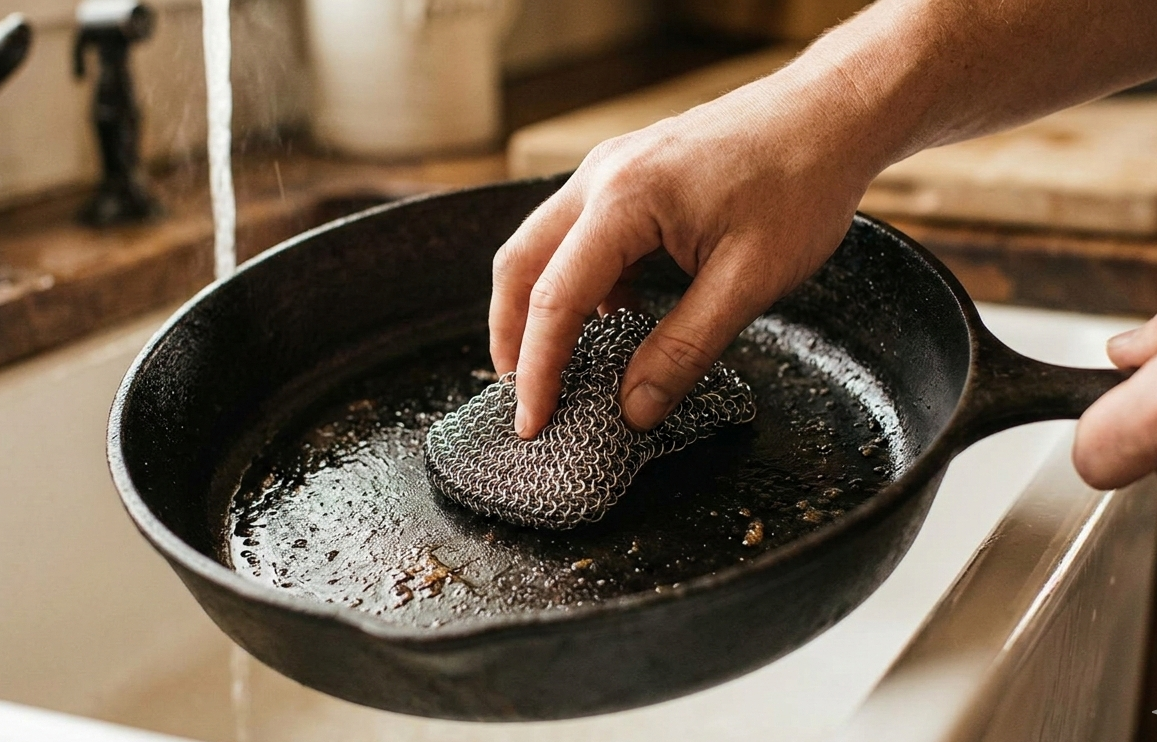
- For stuck-on bits: Use a chainmail scrubber or coarse kosher salt. The coarse grain will lift stubborn grime without damaging the metal underneath.
- The One Golden Rule: No matter what, never, ever put it in the dishwasher. The harsh environment will ruin it instantly.
Step 2: The Drying Phase (Crucial!)
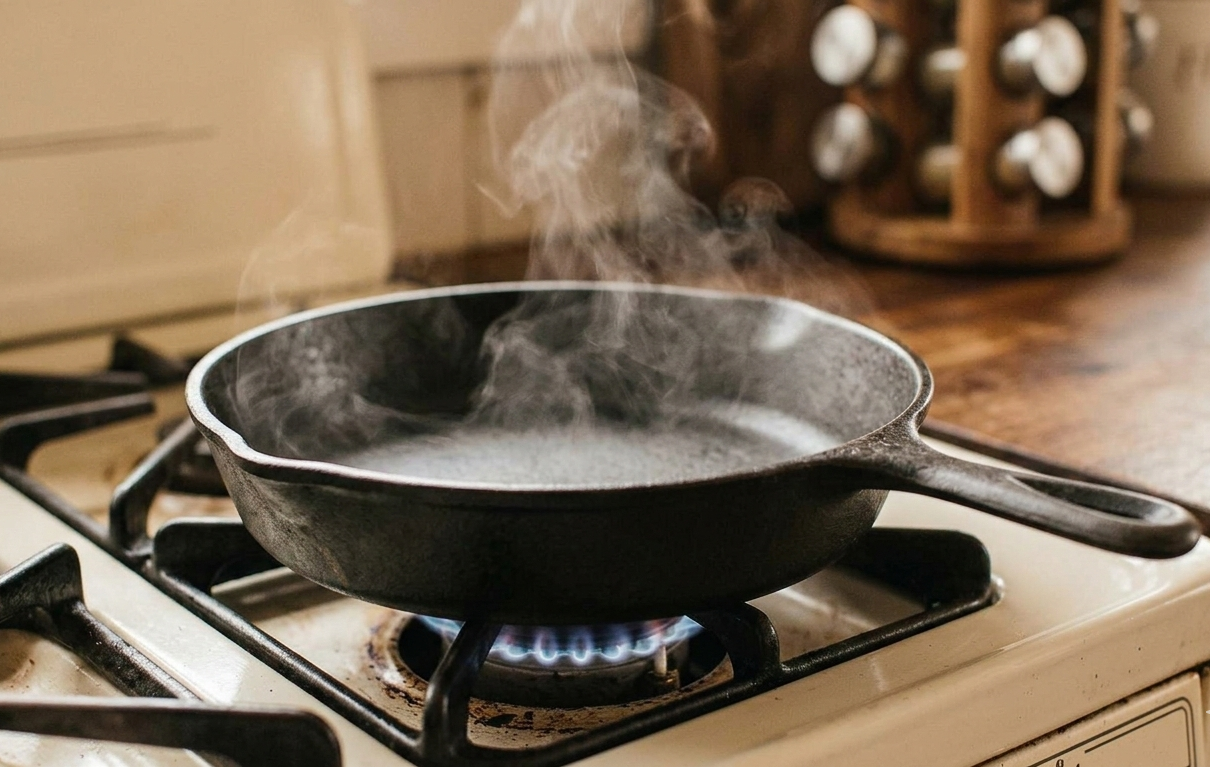
Water is the mortal enemy of iron. If your pan is wet for too long, it will rust, simple as that. While a quick swipe with a dishtowel seems effective, iron is naturally porous. Towel-drying alone leaves microscopic reservoirs of water trapped inside the metal’s pores, just waiting to oxidize. This is arguably the most critical step that people skip.
To truly protect your pan, you need an evaporative dry:
- For light messes: Use hot water and a stiff nylon brush.
- For stuck-on bits: Use a chainmail scrubber or coarse kosher salt. The coarse grain will lift stubborn grime without damaging the metal underneath.
- The One Golden Rule: No matter what, never, ever put it in the dishwasher. The harsh environment will ruin it instantly.
Step 3: The Prep (Maintenance Seasoning)
This final step is your “maintenance seasoning.” Think of it as applying skincare to your pan—you are replenishing its protective barrier after every use. This keeps the seasoning strong, smooth, and ready for the next meal. The crucial element here is using the right oil and using very little of it.
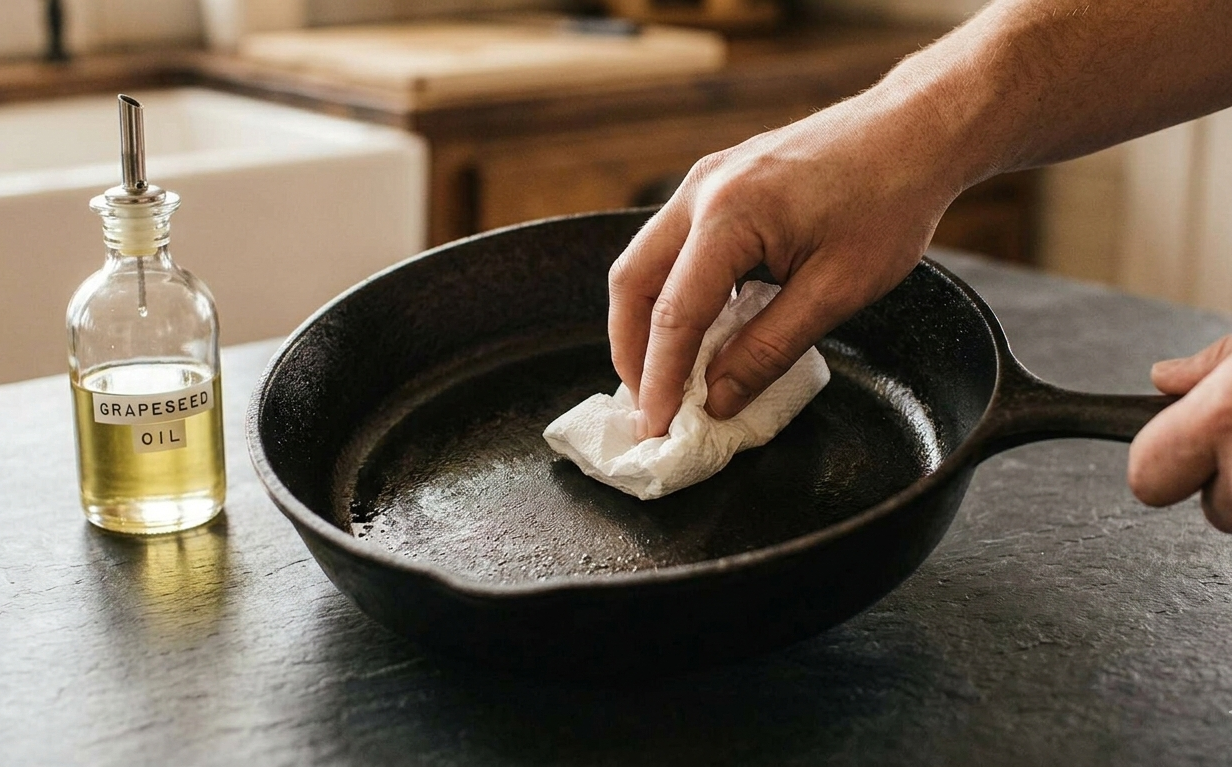
- Apply Oil: While the pan is still warm from the stove, add a very small amount of a high-smoke point oil (see the oil guide below).
- The “Invisible” Layer: Use a paper towel to rub this oil over the entire surface—inside, outside, and the handle. Then (and this is the key!) take a clean paper towel and try to rub all the oil off. Your goal is to leave a layer so thin it’s invisible. If it feels greasy, you used too much.
- Heat It: Place the pan back on the stove and turn the heat up to medium-high. Once you see the first wisp of smoke, let it smoke for 30 seconds, then turn off the burner and let the pan cool on the stove. This ensures the thin film has polymerized.
The Oil Guide: Which Oil Should You Use?
For standard stovetop maintenance seasoning (Step 3), standard canola or vegetable oil works just fine. However, if you are performing a deep re-seasoning of a raw or stripped pan, the choice of oil makes a significant difference in the durability of the final finish.
The science behind seasoning requires an oil that can withstand high temperatures without burning and that is efficient at cross-linking (polymerizing). This means you must select an oil with a high smoke point.
- Smoke Point: This is the temperature at which an oil begins to burn and smoke, breaking down fat and creating acrid flavors. For cast iron, we want polymerization (bonded plastic) and not carbonization (burned ash).
Here are the most common oils and how they perform for seasoning:
Recommended for Stovetop Maintenance & Full Seasoning:
- Grapeseed Oil (~215°C / 420°F): This is widely considered the best all-around oil for both maintenance and creating a factory-like finish. It bonds exceptionally well, creating a hard, slick, and durable layer.
- Crisco / Vegetable Shortening (~255°C / 490°F): The old-school classic. Highly reliable, easy to apply, and creates a tough, dark seasoning that resists flaking.
Use with Caution:
- Flaxseed Oil (~107°C / 225°F): Wait, that smoke point seems low. While flaxseed oil creates the single hardest finish and is often recommended for total restorations, it is highly prone to chipping and flaking if the layers aren’t applied extremely thinly and processed perfectly. It’s a high-effort, high-reward choice.
Avoid:
- Extra Virgin Olive Oil (~190°C / 375°F): The smoke point is too low for effective seasoning; it will burn and smell terrible before it polymerizes. It also doesn’t bond as well, leading to a weak, sticky finish.
- Animal Fats (Lard/Bacon Grease): While great for flavor while cooking, these fats don’t polymerize as effectively for long-term seasoning and can go rancid if the pan isn’t used frequently.
Final Thoughts
At the end of the day, remember that a cast iron pan is one of the few things in your kitchen that actually gets better with age and a little bit of “tough love.” Don’t be afraid to use it, and certainly don’t panic if you see a spot of rust or a bit of sticking—it’s just a signal that it’s time for a quick stovetop touch-up. By following these simple steps of cleaning, drying, and lightly oiling, you aren’t just maintaining a tool; you’re building a culinary legacy. So, get that pan screaming hot, sear off a steak, and enjoy the peace of mind that comes with knowing your favorite skillet is virtually indestructible.
My favorite cast iron is and always will be Lodge. They’re affordable and high quality. Here are the pans I love to use regularly!